Do you see this error message when you log into QuickBooks, backup company files or install QB on another computer:
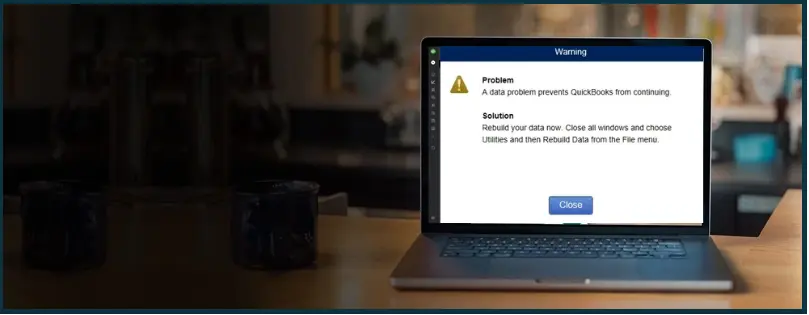
“A data problem prevents QuickBooks from continuing.”
This can point to possible data issues in your company file or QuickBooks application. However, don’t worry, as QuickBooks comes with features like QB Tool Hub and Rebuild and Verify Data utility that helps you address data problems in QuickBooks company files. In this blog, we will explore various solution methods for resolving QuickBooks data validation problems. All right then, let’s dive right in.
 | Although the blog will guide you in resolving the data-related issues, the experts can fix this issue quickly. We recommend you contact a QB ProAdvisor and resolve the problem without further delaying the matter. Dial 1(800) 580-5375. |
Error Message – A Data Problem Prevents QuickBooks from Continuing
Sometimes, while backing up company files, logging into QuickBooks, or installing QuickBooks on another device, you might see an error message that states:
“a data problem prevents QuickBooks from continuing”.
You might also see these error messages in QBWin.log when you are verifying data:
LVL_ERROR–Error: Verify Item History: Build txn target bad pending state. Item = nnnnn
LVL_ERROR–DB error -185 ErrorMessage:’SELECT returns more than one row’ from file:’.\.\src\DMEDLSQLContactEditElement.cpp’ at line 2679 from function:’DMEDLContactEditElement::LoadAdditional
Let us now see the troubleshooting methods to run for fixing data problems to resume QuickBooks operations.
Troubleshooting Data Problems in QuickBooks
In this section, we will walk you through the solutions for resolving QuickBooks data validation problems. Carry out these steps one by one, and reach out to us if you have a query.
1. Update QuickBooks Desktop
Before you proceed with the other solution methods, the first step in fixing data-related errors in QuickBooks is downloading and installing the QuickBooks updates.
Here is how you can update QuickBooks Desktop to the latest release on Windows and Mac.
2. Utilize QuickBooks Tool Hub
QuickBooks Tool Hub comes equipped to help you fix common errors in QuickBooks Desktop. Therefore, if you don’t have QuickBooks Desktop installed on your system already, download and install it.
You can skip the first two steps if you already have QuickBooks Tool Hub installed on your computer.
- Download QuickBooks Tool Hub and save the downloaded file in an easily accessible folder.
- Click on the downloaded file for QuickBooks Tool Hub (exe) to install it. Follow the on-screen instructions and make sure to agree to the terms and conditions, as the installation wouldn’t proceed without that.
- After the installation is complete, double-tap on the icon for QB Tool Hub on the desktop. Alternatively, you can also press the Start button and type in QuickBooks Tool Hub if you can’t see the icon.
a. Run Quick Fix my File
Assuming you have QuickBooks Tool Hub open, follow the steps listed below to run Quick Fix my File. To open the QB Tool Hub, double-tap on the icon for QB Tool Hub on the desktop. Alternatively, you can also press the Start button and type in QuickBooks Tool Hub if you can’t see the icon.
- Tap on Company file issues.
- Now, choose Quick Fix my File.
- Finally, tap on OK when prompted.
b. Use QuickBooks File Doctor
Assuming you have QuickBooks Tool Hub open, follow the steps listed below to run QuickBooks File Doctor. To open the QB Tool Hub, double-tap on the icon for QB Tool Hub on the desktop. Alternatively, you can also press the Start button and type in QuickBooks Tool Hub if you can’t see the icon.
- Tap on Company file
- Now, choose Run QuickBooks File Doctor.
- Allow the File Doctor a minute or around to open. In case the QB File Doctor doesn’t open, manually search for QuickBooks Desktop File Doc in the start menu and run it from there.
- Now, select your company file in QuickBooks File Doctor. If you can’t see your company file, tap on Browse and search and locate your company file.
- Now, choose the Check your file (only the middle option).
- Tap on Continue.
- Provide the QB admin password and tap on Next.
Allow the QuickBooks File Doctor to finish scanning, which might take around 10 to 15 minutes, depending on the file size. Sometimes QuickBooks says the scan was unsuccessful even when it resolves the issue.
Once done, open QuickBooks Desktop and sign into the company file. Check if you see ‘a data problem prevents QuickBooks from continuing’ error message.
Handpick Topic: QuickBooks Data Missing After Update? Try These Steps
3. Run Rebuild Data Utility
To fix the data corruption preventing QuickBooks operation, run the rebuild and verify data utility. This fixes the minor issues with the company file.
a. Rebuild Data
- Open QuickBooks Desktop and tap on the File
- Hover the cursor over Utilities.
- Tap on Rebuild Data.
- You will see the QuickBooks information window. Click on OK.
- QuickBooks will guide you in saving a backup. Follow the instructions.
- Now, allow the tool to repair the file. It might appear that QuickBooks has become stuck. However, check if you can move your mouse, and if you can, everything is fine.
- Once the tool finishes repairing, tap on OK.
b. Verify Data
- Tap on the file
- Hover the cursor over Utilities.
- Tap on Verify Data.
- Tap on OK when you see the message stating that QuickBooks detected no problem with your data
Now, launch QuickBooks Desktop, sign into the company file, and continue your operations. If you see the error message stating that a data problem prevents QuickBooks from continuing, continue to the next solution method.
4. Identify and Manually Fix the Damaged Item
Identifying and manually fixing the damaged data item involves four steps:
- Identifying the item number using the QBWin.log
- Exporting the item list and identifying the damaged item
- Correcting the item’s quantity on hand (QOH)
- Verifying the file again.
Let us look at these four steps one by one.
a. Identifying the item number using the QBWin.log
- Open QuickBooks Desktop.
- Press the F2 key, and you’ll see the product information
- Now, press F3. This will open the Tech Help
- Click on the Open File
- Locate log under the Open File section. Tap on Open.
- After log opens, press the CTRL + F keys together. This will open the Find window. Now, search for the error.
- Now, note down the item number in the error messages.
b. Exporting the item list and identifying the damaged item
- Open QuickBooks Desktop.
- Now, tap on File and click on Utilities.
- Select Export and choose Lists to IIF Files.
- Tap on Item List.
- Now, select a preferred location and finally tap on Save.
- Finally, right-click on the file you saved and tap on Open with Excel. (Alternatively, open Excel and drag the file onto the spreadsheet).
- Find REFNUM that matches the item number in the error message and note down the name of the item.
c. Correcting the item’s quantity on hand (QOH)
- Go to the Reports
- Choose Inventory Valuation Detail under Inventory.
- Now, configure the Date range to All.
- Find the item and check where its date became negative for the first time.
- Now, delete the build assembly that is included in the negative. Alternatively, you can make inventory adjustments to increase the quantity of the negative item.
Before you make an inventory adjustment
Before you go ahead and make an adjustment to the inventory assembly items, there are things you must know.
- When you decrease the quantity of an inventory assembly item, it may lead to the finalized inventory assembly builds changing to pending status. Therefore, we recommend you run the Pending Builds report before and after the inventory adjustment and check if any builds were affected.
- Inventory assembly item quantity adjustments have no effect on the number of the item’s constituents (i.e., inventory parts or other inventory assembly items) shown in the Bill of Materials. You must lower the quantity of the inventory assembly item and increase the quantity of each component if you wish to deconstruct it and restore its components to inventory.
- When you change inventory quantities in QuickBooks, serial or lot numbers must be added or removed if you monitor them. As a result, before changing the amount on hand, you must assign serial or lot numbers to inventory items.
To change an inventory item’s quantity:
- Select Vendors > Inventory Activities> Adjust Quantity/Value on Hand.
- Select Inventory > Inventory Activities> Adjust Quantity/Value on Hand.
- Select Inventory > Adjust Quantity/Value on Hand.
- Choose Quantity by clicking the Adjustment Type drop-down arrow.
- Put the adjustment date here.
- To track inventory adjustments, select the account by clicking on the Adjustment Account drop-down arrow.
- Perhaps you should open a new account specifically for keeping track of inventory adjustments. You can use an expense account for shortages and losses and an income account for profits, or you can utilize one account for all adjustments. If you are unsure about the kind of account to utilize, speak with your accountant.
- You must generate separate adjustments—one for each account—if you need to make changes to several items and assign those changes to various accounts.
- To apply the adjustment, click the drop-down arrow next to Inventory Site and choose the required site.
- Add a reference number (optional).
- (Optional) Select the Customer: Job drop-down arrow, then click a customer or job to assign this modification to them.
- (Optional) Select the Class drop-down arrow and then pick a class if you use class tracking.
- To add items, click on the item column. Additionally, you can add more than one object.
- In the relevant column, enter the New Quantity or the Qty Difference.
- Enter the difference between the quantity that is now in QuickBooks and the real quantity in the Qty Difference
- For instance, enter -5 as the difference if you need to reduce the quantity by five.
- (Optional) To remind yourself later on why you changed the quantity, write a note in the Memo
- Click on Save to save the adjustment.
d. Verifying file again
Now, to check the data issue is resolved, let us verify the company file again.
- Tap on the file
- Hover the cursor over Utilities.
- Tap on Verify Data.
- If you get the message “QuickBooks detected no problems“, you are ready to carry on the operations on the company file.
- If you get the message “A data problem prevents QuickBooks from continuing“, perform all these four steps in identifying and manually fixing the damaged data item.
Strong Recommendation for: Is QuickBooks Running Slow Over Network? Try These Solutions
Bottom Line
The above blog will guide you on the troubleshooting methods to carry out if your QuickBooks says that a data problem prevents QuickBooks from continuing. Hopefully, you will be successful in fixing data-related errors in QuickBooks.
However, if the issue persists and you continue to see the error message or have a query, you can reach out to our QB ProAdvisors. These QB experts will help you resolve the data-related issues in no time so that you can continue your work right away. Dial 1(800) 580-5375 and connect with them now.
Frequently Asked Questions
Ans- We have discussed how to fix the data issues in QuickBooks Desktop in detailed steps in this blog. Explore the troubleshooting methods to fix the data-related issues in QuickBooks Desktop.
Various reasons like issues in the QuickBooks file of installation, corruption in the company file, or data damage can lead to QuickBooks stopping working. Run QuickBooks File Doctor to fix minor company file issues.
There are many things that can lead to data corruption in QuickBooks. The major reason that commonly causes QuickBooks data corruption is the improper system shutdown. Issues with the network, hard disk, software, and even hardware can also result in corrupted data.
If QuickBooks File Doctor doesn’t open when you open it from the QuickBooks Tool Hub, go to the start menu and search for QuickBooks Desktop File Doc. Now, run the QuickBooks File Doctor from here.