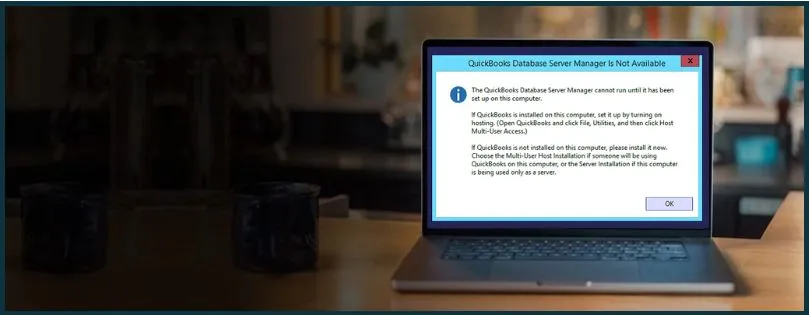
Is your QBDBMgrN not running while switching QuickBooks into multi-user mode? This is a common issue that is noticed when you run the QuickBooks Database Server Manager. ‘QBDBMgrN not running on this computer’ and ‘Windows Firewall: Disabled exceptions not defined’ are two error messages that generally appear after running QB database server manager on the server.
Once affected by this error, you will not be able to enable multi-user mode to share the company files over a network. Read this detailed guide to learn why this issue arises and how to resolve it.
 | Problems with the QuickBooks Database Server Manager can be very frustrating. They can prevent you from hosting the company files on the network, so the issue needs to be resolved as soon as possible. If you need expert assistance in fixing the QBDBMgrN not running issue, you can call our QB support team at 800-580-5375. |
Reasons Why QuickBooks Database Server Manager Will Not Start
There can be many reasons why you are unable to start QB Database Server Manager. This issue can arise due to problems within the QBDBMgrN utility or QuickBooks. It is essential to understand why this issue arises to ensure that you are able to fix it correctly. Learn about the main triggers mentioned below before undertaking the troubleshooting process –
- The QuickBooks Database Server Manager might be damaged or corrupted.
- You are using an outdated version of the QB Database Server Manager.
- Your QB Desktop might be old or outdated, causing compatibility issues while using QBDBMgrN.
- Essential configuration files, like the .ND and .TLG files might be damaged or corrupted.
- The Windows firewall or the anti-virus program might restrict QB from accessing the internet.
- Your QuickBooks Desktop is not correctly installed, or the QB program might be damaged.
- There is a lack of admin privileges while accessing the QBDataServiceUser account.
- Your QB data files might be damaged or corrupted, leading to data integrity and hosting issues.
- The network path to the server might be damaged, which can be another reason for this issue.
- The hosting settings in QuickBooks might be misconfigured.
- There are other network and internet connectivity issues while running QB and the QB Database Server Manager.
These are the most common reasons why QBDBMgrN is not running. Now, let’s move to the next section and learn how to fix this issue effectively.
Solutions to Implement When QuickBooks Database Server Manager Has Stopped Working
Until this issue is fixed, you won’t be able to run the QB Database Server Manager. Thus, once you know the reasons why QuickBooks Database Server Manager won’t start, follow the troubleshooting solutions mentioned below to fix the root causes –
Solution 1 – Configure QB Database Server Manager
Sometimes, correctly configuring the database server manager can fix general problems that might be causing the issue. To modify the QB Database Server Manager settings, follow the steps below –
- Press the Windows + R keys to open the Run window and type Services.msc in the search box.
- Scroll down and locate the QuickBooksDBXX service, wherein XX stands for your QB Database Server Manager version.
- Double-click the service and set the Startup Type as Automatic, then set the Service Status to Running or Started.
- Further, go to the Recovery tab and select Restart the Service from the First Failure drop-down menu. Then, repeat the same for the Second and Subsequent Failure and hit OK.
Once done, reboot your PC and run the utility again to check the status of the issue. If QBDBMgrN is not running on the server even after restarting it, move to the next solution.
Solution 2 – Update QBDT to the Latest Version
Updating QuickBooks can provide the latest features and product improvements. This can help fix compatibility issues while running the QB Database Server Manager. To update it, implement the steps given below –
- Access QuickBooks Desktop, then move to the Help menu and click Update QuickBooks Desktop.
- Next, select Update Now, then select the Reset Update checkbox, and click Get Updates.
- Once the updates are downloaded, reopen QuickBooks and click Install Now to install the software updates.
Now, restart your PC, rerun QuickBooks, and access the QuickBooks Database Server Manager. If QBDBMgrN is not running even after updating QB, move to the next solution.
Solution 3 – Use QB Tool Hub to Repair QuickBooks
It might be possible that your QuickBooks Desktop program is damaged or the application is facing installation issues. These issues can be why you are unable to run the QBDBMgrN utility. To fix these issues, run a QuickBooks repair by using the QuickBooks Tool Hub in the following manner –
Step 1 – Download and Install QuickBooks Tool Hub
The QB Tool Hub is a hub of various tools and features used to address issues within QuickBooks. To use these tools and features, you must download and install the QB Tool Hub using the instructions below –
- Close QuickBooks, download the recent QuickBooks Tool Hub version by clicking Here and save the setup file somewhere on the PC where you can easily find it.
Note: If you already have QB Tool Hub installed in the system, go to the bottom of the Home tab to find out which version you have. It must be the latest version (1.6.0.5).
- Next, open the QuickBooksToolHub.exe setup file downloaded above, follow the on-screen instructions, and accept the terms and conditions to install the program.
- Wait for the program to get installed, then double-click the QB Tool Hub icon on your Windows desktop to launch it.
Note: If you are having trouble locating the QB Tool Hub icon, manually search for “QuickBooks Tool Hub” in the Windows search panel and open the program.
Once the program is installed, move to step 2 and use the Quick Fix My Program tool.
Step 2 – Use the Quick Fix My Program Utility
The Quick Fix My Program tool helps resolve general issues in the QB software. This tool terminates background processes that QuickBooks uses to refresh them. It also runs a quick repair to eliminate the program issues effectively. Follow the steps given below to utilize the Quick Fix My Program tool –
- Open the QB Tool Hub, then select the Quick Fix My Program tool from the Program Problems section and run the tool.
- Once the tool stops running, reopen QuickBooks and access your data file to check if the issues are addressed.
However, if you are still facing the QBDBMgrN not running issue, use the QB Install Diagnostic tool in the next step and fix the installation problems.
Step 3 – Use the QuickBooks Install Diagnostic Utility
The QB Install Diagnostic tool fixes general installation problems in the application. To run this tool, implement the following steps –
- Firstly, launch QB Tool Hub, then move to the Installation Issues menu and select the QuickBooks Install Diagnostic tool.
- Let the tool run and fix the installation issues, which can take up to 20 minutes. When the tool completes the diagnosis, restart the PC, open QuickBooks Desktop, and access your data file.
Make sure QB is updated to the latest release and has the recent security updates. Then, rerun the QB Database Server Manager and check the status of the issue. If you are still facing issues while running this utility, move to the next solution.
Solution 4 – Clean Install QBDT
If repairing QuickBooks doesn’t help fix the problems, try clean installing QuickBooks Desktop. This can help get rid of problems in the current version that might cause the QBDBMgrN not to work correctly. Implement the detailed steps mentioned below to clean install the software –
Step 1: Remove QuickBooks from the PC
Firstly, remove QuickBooks from your system by running an uninstallation process. Make sure to back up your files and keep the product and license information handy. Then, follow the steps below to uninstall QB –
- Access the Control Panel from the Windows Start menu, then select the Programs and Features or Uninstall a program option.
- Choose QuickBooks from the list of installed apps, then select Uninstall/Change, Remove, and click Next. If you don’t see this option, sign back into Windows with admin account credentials and remove QuickBooks.
Once QuickBooks Desktop is removed from the system, rename the installation folders in the next step.
Step 2 – Modify the QB Installation Folder Name
After removing QBDT, rename the installation folders to prevent QuickBooks from using the leftover installation folders. Follow the steps given below to rename the installation folders –
- Search for “File Explorer” in the Windows search panel, open it, and then go to the QuickBooks company file folder.
- The company file folder is usually the QuickBooks Folder that can be found in one of the following locations-
- C:\ProgramData\Intuit\QuickBooks (year)
- C:\Users\(current user)\AppData\Local\Intuit\QuickBooks (year)
- C:\Program Files\Intuit\QuickBooks (year)
- 64-bit version C:\Program Files (x86)\Intuit\QuickBooks (year)
- Next, right-click the folder, click Rename, and add “.old” at the end of the folder name, followed by hitting Enter.
However, if you get an access error message while renaming the installation folder, end QuickBooks processes by following these steps –
- Right-click the Windows Task Bar, select Task Manager, then navigate to the Processes tab.
- Further, select the Name column header to sort the list, then select the following processes: QBDBMgrN.exe, QBDBMgr.exe, QBCFMonitorService.exe, and Qbw32.exe.
- Next, click End Process for each of the processes and terminate them.
- Hit Yes when you see the “WARNING: Terminating a process can cause undesired results…” message and end the process.
Once the folders are renamed, move to step 3 and install QBDT again.
Step 3: Reinstall QuickBooks Desktop
Now, you need to install QuickBooks and activate it. Firstly, make sure your PC meets the minimum system requirements for installing QB and that the license and product details are handy. Then, follow the steps given below to quickly install the software –
- Download the QuickBooks setup file from the (CAMPs) or the download site, then save the .exe setup file to an easily accessible location on the PC.
- Open the QuickBooks.exe file, follow the on-screen prompts, accept the license agreement, and click Next.
- Enter your product and license numbers, hit Next again, and then ensure that you have an active internet connection before proceeding.
- Further, choose Express Install as the Installation Type, hit Next, and select Install.
- Once the installation is completed, reopen QuickBooks and proceed with the registration process.
- Go to the Help tab, choose Activate QuickBooks Desktop, follow the on-screen instructions to verify your info, and enter the Product and License Info.
Once QuickBooks is successfully installed and activated, run QuickBooks Database Server Manager. If QuickBooks Database Server Manager fails to start, move to the next solution.
Solution 5 – Modify the .ND and .TLG File Names
The Network Data and Transaction Log files are essential configuration files in QuickBooks. If these files are corrupted, it can lead to the QB Database Server Manager not running issue. To fix this issue, rename these files following the instructions below –
- Launch QB, press the F2 key, open the Product Information window, then go to the File Information section.
- Next, find and note down the company file location, then go to Windows File Explorer and open the company file folder.
- Now, locate the files with your company file name but with the .ND and .TLG extensions (like, company_file.qbw.nd / company_file.qbw.tlg).
- If you can’t find the files, edit the Windows Files and Folder settings by following these steps –
- Open File Explorer, select View, then click Options, select Change Folder and Search.
- Open the View tab, move to the Advanced Settings section, and select Show hidden files, folders, and drives, then hit OK.
- Locate the .ND and .TLG files, then right-click each file and select Rename.
- Add “.OLD” at the end of each file name (example: company_file.qbw.nd.OLD), and once done, rerun QuickBooks and sign in to your company file.
Once the files are renamed, try to rerun the QBDBMgrN utility. If QuickBooks Database Server Manager is not starting, move to the next solution to fix the issue.
Solution 6 – Review the QB Hosting Setup
Sometimes, incorrect hosting setup can be a reason why the QB Database Server Manager couldn’t start. Make sure that the hosting settings on the server PC are correct by following the steps below –
- Firstly, open QuickBooks on the server PC, go to the File menu, then select Utilities.
- Select the Host Multi-User Access option, then hit Yes on the Host Multi-User Access window. If you see the Stop Hosting Multi-User Access option instead, it means that the hosting setup is already correctly set.
Once done, rerun QBDBMgrN and check the status of the issue. If QBDBMgrN.exe is not running, move to the next solution.
Solution 7 – Reinstall the QB Database Server Manager Utility
If your QBDBMgrN keeps stopping, try reinstalling it. This can help fix any installation problems in the current QuickBooks Database Server Manager. Follow the steps given below to remove and reinstall the utility –
Step 1 – Uninstall QuickBooks Database Server Manager
Firstly, uninstall the current QB Database Server Manager version by following the steps below –
- Press the Windows + R keys on your keyboard and access the Run window, then type appwiz.cpl in the Run dialog box.
- Next, click OK, select the QuickBooks Database Server Manager, and click the Uninstall/Change option.
Once QuickBooks Database Server Manager is removed, rename the installation folder in the next step.
Step 2 – Modify the Installation Folder Name
Implement the steps mentioned below to rename the installation folder –
- Move to the Installation Folder location (Example: C:\Program Files\Common Files\Intuit), then press the Windows key + R on your keyboard.
- Further, copy and paste the location of the folder, hit Enter, and right-click the folder.
- Lastly, choose Rename, then add “.OLD” at the end of the file name and hit Enter to implement the changes.
Once the folder is renamed, move to the next section and reinstall QBDBMgrN.
Step 3 – Install QB Database Server Manager
The last step is to install the QuickBooks Database Server Manager on the system. Implement the steps given below to run the installation process –
- Firstly, close all open programs on your server PC, then download and open the installed file Setup_QuickBooks.exe file.
- Follow the on-screen instructions and keep your product and license details handy.
- Next, select Custom or Network Options as the Installation Type, then hit Next, and choose the best option for your network setup.
- Select Next and choose between the following two options to install the Database Server Manager –
- If you want QB Database Server Manager and QuickBooks Desktop on your server PC, click the “I’ll be using QuickBooks Desktop on this computer, AND I’ll be storing…” option.
- On the other hand, if you only want QB Database Server Manager on your server computer, select the “I will NOT be using QuickBooks Desktop…” option.
Note: If QBDT is already installed on your server PC, this step will not overwrite any existing company data.
- Once the preferred option is selected, click Install and wait for the process to end.
Once QB Database Server Manager is successfully installed, run it and check if the “QuickBooks Database Server Manager crashing” issue has been fixed.
Solution 8 – Run QBDataServiceUserXX with Admin Rights
The QBDataServiceUser account is created to manage the separate QuickBooks Database Manager service. This account allows QBDBMgrN to provide services to any user who logs in to Windows. Lack of proper permissions while using this user account can cause issues in the utility. Thus, ensure that the QBDataServiceUser account has admin privileges in the following manner –
- Close QuickBooks, open the Windows Start menu, and access the Control Panel.
- Select User Accounts, and find the QBDataServiceUserXX for your QB version as follows –
- QuickBooks 2020: QuickBooksDB30
- QuickBooks 2019: QuickBooksDB29
- QuickBooks 2018: QuickBooksDB28
- Select Change account type, then choose Administrator, and click Change Account Type, followed by hitting Apply.
If you still find QBDBMgrN not running on the system, move to the next solution.
Solution 9 – Recreate QBDataServiceUserXX
When the QBDataServiceUserXX account is damaged, it can cause issues with the QB Database Server Manager. Thus, you need to recreate QBDataServiceUserXX in the following manner –
- Exit QB, then press the Windows + R keys and open the Run window.
- Type services.msc in the command box and press Enter.
- Further, right-click the service that matches your QB version and choose Properties.
- QuickBooks 2020: QuickBooksDB30
- QuickBooks 2019: QuickBooksDB29
- QuickBooks 2018: QuickBooksDB28
- Now, go to the Log On tab and set the service to This Account. Do not select Local System, as only some set-ups allow it to work on the local system.
- Next, delete qbdataserviceuserXX by implementing the steps below –
- Press the Windows + R keys to open the Run window, and type Control Panel in the text box.
- Select OK, then click User Accounts and select Remove user account.
- Lastly, select the qbdataserviceuserXX that matches your QB version and hit Delete.
- Once done, relaunch QuickBooks and turn on the hosting. If hosting was already enabled, turn it off and then turn it on again.
- When a prompt asking to run QB Database Server Manager pops up, hit OK and open the QB Database Server Manager.
- Lastly, scan the file, which will recreate the QBDataServiceUser.
After the process ends, rerun QuickBooks and the QB Database Server Manager. Check if the issues while running QBDBMgrN are resolved; if not, move to the next solution.
Solution 10 – Ping the Server from the Workstations
If none of the above solutions work, try pinging the server from the workstation. This can help check the network connectivity status. Follow the steps given below to ping the server –
- Open the Windows Start menu and search for “Network and Sharing Center” on both the server PC and workstations.
- Next, select the Change Advanced Sharing Settings option and make sure that the Turn on Network Discovery option is selected.
- Press the Windows + R keys on the server computer, then type CMD in the command box and press Enter.
- Further, when the black color command prompt window appears, type ipconfig/all and press Enter.
- In the IP Configuration window, note down the “hostname” that appears next to the Host Name.
- Open the Run command window on the user’s workstation that is facing the issue while running QBDBMgrN.
- Type CMD, press Enter, then enter the command – ping [your server name] and hit Enter.
- Now, if you received all the packets that were sent, then there are no issues with this workstation. However, in case of packet loss, you need to troubleshoot the network issues.
Check the network connectivity on all the workstations. If there are network issues, move to the next solution and configure the Windows firewall.
Solution 11 – Configure Windows Firewall and Anti-Virus Settings
The Windows firewall settings might create restrictions that can prevent QB from accessing the internet. Moreover, a misconfigured Windows firewall can also lead to a lack of permissions while running QBDBMgrN on the server PC. Thus, you need to configure the firewall and the anti-virus app in the following manner –
Step 1 – Use QB File Doctor Utility
The QuickBooks File Doctor tool helps fix company file damage and network issues in the application. Before running this tool, make sure the QB Tool Hub is installed (see ‘Step 1: Download and Install QuickBooks Tool Hub’ following the instructions in ‘Solution 3: Use QB Tool Hub to Repair QuickBooks’ above). Then, run QB File Doctor in the following manner –
- Launch the QB Tool Hub program, then go to the Company File Issues menu and select the QuickBooks File Doctor tool.
Note: The tool might take a minute to open, but if it remains inaccessible, manually search for “QuickBooks Desktop File Doc” in the Windows search panel and access QB File Doctor.
- Further, choose your company file from the dropdown list, but if you can’t locate it, select Browse and Search. Find and choose the company files you want to repair, and then proceed further.
- Choose the Check your file and Network option, click Continue, and use your QB admin login credentials.
- Select Next, initiate the repair process, and once the scan finishes, relaunch QuickBooks and open the company file.
Note: Depending on the file size, the scan process might take up to 15 minutes. Ensure that you don’t close the tool or interrupt the process. Remember, sometimes the scan may indicate that the process wasn’t successful, even if the company file and network issues are resolved.
After running the tool, check if the company file and network issues are fixed. If they persist, run the QBDBMgrN utility. Then, configure the firewall manually following the instructions in the next step.
Step 2 – Configure Firewall and Create Exceptions
You need to manually configure the Windows Firewall settings to allow QuickBooks to bypass the restrictions while accessing the internet. It will also allow proper permissions for QBDBMgrN to run on the server. To configure the firewall, create exceptions for QuickBooks in the following manner –
Create Firewall Exceptions for QuickBooks Ports
Follow the instructions below to create firewall exceptions for QuickBooks–
Note: If you are using multiple QB Desktop versions on the same PC, these configuration steps need to be performed for each local version. Moreover, you need to add each year’s port numbers to the “specific ports” field in step 4 below.
- Type “Windows Firewall” in the Windows search panel and open it.
- Next, navigate to the Advanced Settings tab, right-click the Inbound Rules option, and choose New Rule.
- Further, select Port, hit Next, and make sure that TCP is checkmarked.
- Find the specific ports according to your QBDT version from the list below and insert the port number in the Specific Local Ports field.
- QuickBooks Desktop 2020 and later: 8019, XXXXX.
- QuickBooks Desktop 2019: 8019, XXXXX.
- QuickBooks Desktop 2018: 8019, 56728, 55378-55382.
- QuickBooks Desktop 2017: 8019, 56727, 55373-55377.
Note: If you use QBDT 2019 or future versions, you need to add Dynamic Port Numbers. These dynamic ports are specifically assigned during installation to give QBDT exclusive use of a particular port.
- Get the Dynamic Port Number according to your QB Desktop version by using these steps –
- Access the Windows Start menu, type “QuickBooks Database Server Manager” in the search panel, and select it to open it.
- Open the Port Monitor section, find your QuickBooks Desktop version, and note the Port Number, as you need to add it to the exceptions list.
Note: You can modify the assigned port number (for QBDT 2019 and future versions) by selecting Renew. If you choose to renew, go to the Scan Folder tab, then click Scan Now to reset the firewall permissions.
- Enter the port number in the list, select Next, and choose Allow the Connection.
- Click Next, ensure that all the profiles are marked (if asked), then hit Next and make a new exception rule named “QBPorts(year).”
- Once the rule is created, hit Finish and repeat the steps to create Outbound Rules for QB ports. Perform steps 1 to 7 above, but select Outbound Rules instead of Inbound Rules in Step 2, then save the rule.
After the rules are created, launch QB and switch to the multi-user mode. Then, check if the issues with the QB Database Server Manager are fixed. If not, go to the next section and add firewall exceptions for QuickBooks executable files.
Create Exceptions for QuickBooks Executable Files
QuickBooks Desktop uses the executable files to perform various tasks and functions. You can create firewall exceptions for these executable files in the following manner –
- Type “Windows Firewall” in the Windows search bar and access the utility, then go to the Advanced Settings menu.
- Further, right-click Inbound Rules, select New Rule, and click Program.
- Click Next, select This Program Path, then hit Browse to pick an executable file from the list referred to below-
| Executable files | Location |
| AutoBackupExe.exe | C:\Program Files\Intuit\QUICKBOOKS YEAR |
| Dbmlsync.exe | C:\Program Files\Intuit\QUICKBOOKS YEAR |
| DBManagerExe.exe | C:\Program Files\Intuit\QUICKBOOKS YEAR |
| FileManagement.exe | C:\Program Files\Intuit\QUICKBOOKS YEAR |
| FileMovementExe.exe | C:\Program Files\Intuit\QUICKBOOKS YEAR |
| QuickBooksMessaging.exe | C:\Program Files\Intuit\QUICKBOOKS YEAR |
| QBW32.exe | C:\Program Files\Intuit\QUICKBOOKS YEAR |
| QBDBMgrN.exe | C:\Program Files\Intuit\QUICKBOOKS YEAR |
| QBServerUtilityMgr.exe | C:\Program Files\Common Files\Intuit\QuickBooks |
| QBCFMonitorService.exe | C:\Program Files\Common Files\Intuit\QuickBooks |
| QBLaunch.exe | C:\Program Files\Common Files\Intuit\QuickBooks |
| QBUpdate.exe | C:\Program Files\Common Files\Intuit\QuickBooks\QBUpdate |
| IntuitSyncManager.exe | C:\Program Files\Common Files\Intuit\Sync |
| OnlineBackup.exe | C:\Program Files\QuickBooks Online Backup |
- Hit Next, click Allow the Connection, then hit Next again and make sure that all the profiles are marked (if asked).
- Now, click Next, then create an exception rule named “QBFirewallException(name.exe) and save it.
- Follow the steps above (steps 1 to 5) to create Outbound Rules for the QB executable files. In Step 2, make sure to select Outbound Rules rather than Inbound Rules, then save the rule.
Once exceptions are successfully created for QB executable files, rerun QuickBooks in the multi-user environment. Once done, check the status of the QBDBMgrN not running issue. If it persists, move to step 3 and configure the anti-virus program.
Step 3 – Configure the Anti-Virus Software
If configuring the Windows firewall didn’t help, review your antivirus settings to make sure QB has general permissions. Modifying the anti-virus settings can help remove QB restrictions. The configuration steps may vary depending on the anti-virus program; thus, follow the specific guidelines as per your software. You can visit the official website of the antivirus you are currently using or contact your vendor to reconfigure the settings.
Once the anti-virus program is configured and QB restrictions are removed, relaunch the software. Then, use the QuickBooks Database Server Manager to check if the issues are resolved. If the issues with QBDBMgrN persist, move to the next solution.
Solution 12 – Utilize the QB Verify/Rebuild Data Tool
Sometimes, data issues in QuickBooks can cause the QBDBMgrN to stop running. These issues can be tackled by using the QuickBooks Verify and Rebuild Data utility in the following manner –
Step 1 – Run QuickBooks Verify Data Tool
The Verify Data tool in QuickBooks is used to identify data issues that compromise data integrity. Run this tool by following the detailed steps below –
- Open Window, select Close All, then from the File menu, select Utilities.
- Next, select Verify Data, run the tool, and take the following actions –
- If the tool detects no problems with your data, your data is clean, and you don’t need to proceed with the further steps.
- If you get an error message, search for the error on this website and learn how to fix it.
- Lastly, if the data has lost its integrity, data damage might have been found in the file. In such a scenario, use the Rebuild Data tool to fix the issues.
Once data issues are identified, move to step 2 and run the Rebuild Data tool.
Step 2 – Use the QB Rebuild Data Utility
The Rebuild Data tool can help fix the data integrity issues found by the Verify Data tool. To run this tool, implement the steps given below –
- Go to the QB File menu, click Utilities, and select the Rebuild Data option.
- When QuickBooks asks you to create a data backup, click OK and create the backup.
- Select where you want to save the backup file, hit OK again, and make sure you don’t replace another backup file in the process. Enter a new name for the backup file in the File name and hit Save.
- Hit OK when the Rebuild has completed message appears, then move back to the File menu.
- Click Utilities and select Verify Data again to check for additional data damage, then take the following actions –
- If the Verify Data tool finds more damage, resolve it manually by searching for the error(s) in the qbwin.log and solutions on this website.
- If no issues are found, restore a recent backup by going to the File menu and clicking the Open or Restore Company option.
Note: Don’t replace the existing company file, as you will need to re-enter info into your company file after the backup is created.
After running the QB Rebuild Data tool, open QuickBooks and check if the data issues are fixed. Then, rerun the QuickBooks Database Server Manager and make sure that it is running properly.
Conclusion
We hope this detailed guide helped you resolve the QBDBMgrN not running issue. However, if the solutions mentioned above seem ineffective or you are stuck in the process, reach out to the experts at 800-580-5375 to get the best guidance in fixing the issue.
FAQs
To scan your folders with the QB Database Server Manager, follow the steps mentioned below –
• Open the Windows Start tab on the server PC and enter “Database” in the search bar.
• Open the QuickBooks Database Server Manager and go to the Scan Folders tab.
• Next, hit Browse and select the company file folder, then click OK.
• When you are ready, click Start Scan and wait for the process to complete. Then, find the folder in the QuickBooks company files found section and access the company file.
The following QB and Windows versions might encounter the QBDBMgrN not running issue –
• QuickBooks Enterprise 2018
• Server 2012
• Windows 10
• QuickBooks 2019
• QuickBooks Desktop Pro 2022
• Windows Server 2019
• QuickBooks 2016 Premier
• QuickBooks Pro 2021
• QuickBooks Enterprise 19.0 R12P
• Windows 7
• Windows Essential 2016
• QB 2022 Premier/Accountant
Yes, you need to create a company file backup to ensure that there is no data loss in the troubleshooting process. To create the file backup, follow the steps below-
• Open the QB File menu and select Switch to Single-User Mode, then go back to the File menu.
• Select Backup Company, choose Create Local Backup, and hit the Local Backup option.
• Click Next, access the Local Backup Only section, select Browse, and choose a location to save the backup file.
• Specify the number of backups if you want, then let the application run a data integrity test.
• Lastly, hit OK and click Save Now to save the backup.